How to Solve a Rubik’s Cube: A Step-by-Step Guide for Beginners
The Rubik’s Cube is a fascinating and rewarding puzzle that has captivated millions of people worldwide. While it may seem daunting at first, solving the cube is entirely achievable with the right approach. In this guide, we’ll walk you through the beginner’s method, a simple and systematic way on how to solve a Rubik’s Cube.
By the end of this article, you’ll have the tools and knowledge to solve the cube on your own!
Understanding the Rubik’s Cube
Before diving into the solution, it’s important to understand the structure of the Rubik’s Cube:
The cube has 6 faces, each with a distinct color: white, yellow, red, orange, blue, and green.
Each face consists of 9 smaller squares (3×3 grid).
The cube has three types of pieces:
Centerpieces (6): These determine the color of each face and do not move relative to each other.
Edge pieces (12): These have two colors and sit between the centerpieces.
Corner pieces (8): These have three colors and sit at the corners of the cube.
Centerpieces
Edge Pieces
Corner Pieces
The goal is to arrange the cube so each face has a uniform color.
General Rule for Determining the Front Face Color
The front face color is always determined by the piece you’re solving and its relationship to the centerpieces.
Look at the colors of the piece you’re working on and align it with the corresponding center color on the front face.
The Beginner’s Method: Step-by-Step How to Solve a Rubik’s Cube
The beginner’s method breaks the solution into 7 easy-to-follow steps. Let’s dive in!
Step 1: Solve the White Cross
Objective: Create a white cross on the white face, with the edge pieces matching the center colors of the adjacent faces.
Front Face:
The front face color is determined by the edge piece you’re working on.
For example, if you’re solving the white-green edge, the green center will be your front face.
Align the white-green edge with the green center, then rotate it into the white face.
Locate the white edge pieces:
These are the pieces with two colors, one of which is white.
There are four white edge pieces in total.
Position each white edge piece:
Move each white edge piece to the white face, aligning it with the corresponding center color.
For example, if the edge piece has white and red, align it with the red center.
Form the white cross:
Rotate the edge piece into the white face to form the cross.
Repeat for all four white edge pieces.
Tip: The white cross should look like a “+” sign, with each edge piece matching the adjacent center colors.
Tip: Whether you solve the white cross on the top face or bottom face is a matter of personal preference. Both approaches are valid, and each has its advantages. Here’s a breakdown of both methods to help you decide which one works best for you:
A. Solving the White Cross on the Bottom Face
Advantages:
Easier Visualization:
Since the white cross is on the bottom, you can clearly see the other colors (red, blue, orange, green) on the sides, making it easier to align the edge pieces with their corresponding centers.
Simpler Middle Layer Moves:
When you move on to solving the middle layer (Step 3), the white face is already out of the way, so you don’t have to worry about disturbing it.
The standard for the CFOP Method:
If you plan to learn advanced methods like CFOP (used by speedcubers), solving the white cross on the bottom is the standard approach.
How to Solve the White Cross on the Bottom:
Hold the cube with the white center on the bottom face.
Locate the white edge pieces (they have white and one other color).
Move each white edge piece to the bottom face, aligning it with the corresponding center color.
For example, if the edge piece has white and green, align it with the green center.
Rotate the edge piece into the bottom face to form the cross.
Repeat for all four white edge pieces.
B. Solving the White Cross on the Top Face
Advantages:
Easier for Beginners:
Solving the white cross on the top face allows you to see all the pieces clearly, which can be helpful if you’re just starting out.
No Need to Flip the Cube:
You can keep the white face on top throughout the entire process, which some beginners find more intuitive.
Good for Visual Learners:
Since the white cross is on top, you can easily see how the edge pieces align with the side centers.
How to Solve the White Cross on the Top:
Hold the cube with the white center on the top face.
Locate the white edge pieces (they have white and one other color).
Move each white edge piece to the top face, aligning it with the corresponding center color.
For example, if the edge piece has white and green, align it with the green center.
Rotate the edge piece into the top face to form the cross.
Repeat for all four white edge pieces.
Which Method is Better?
For Beginners: Solving the white cross on the top face is often easier because it allows you to see all the pieces clearly without flipping the cube.
For Advanced Solvers: Solving the white cross on the bottom face is more efficient and aligns with advanced methods like CFOP.
Key Tips for Both Methods:
Always align the edge pieces with their corresponding centers:
For example, the white-red edge should align with the red center.
Practice both methods:
Try solving the white cross on the top and bottom to see which one feels more natural to you.
Stay consistent:
Once you choose a method, stick with it to build muscle memory and improve your speed.
Example Scenario
If you’re solving the white cross on the bottom face:
Hold the cube with the white center on the bottom.
Find the white-green edge and align it with the green center.
Rotate the edge into the bottom face to form part of the cross.
Repeat for the white-blue, white-red, and white-orange edges.
If you’re solving the white cross on the top face:
Hold the cube with the white center on the top.
Find the white-green edge and align it with the green center.
Rotate the edge into the top face to form part of the cross.
Repeat for the white-blue, white-red, and white-orange edges.
By choosing the method that feels most comfortable to you, you’ll be able to solve the white cross efficiently and move on to the next steps with confidence.
Step 2: Solve the White Corners
Objective: Place the white corner pieces in their correct positions to complete the white face.
Front Face:
The front face color is determined by the corner piece you’re solving.
For example, if you’re solving a white-green-orange corner, the green and orange centers will determine the front and right faces.
Hold the cube so that the green center is on the front face and the orange center is on the right face.
Left White Corner (5x Algorithm)
Right White Corner (1x Algorithm)
Top White Corner (3x Algorithm)
Locate a white corner piece:
These are the pieces with three colors, one of which is white.
There are four white corner pieces in total.
Position the corner piece below its correct spot:
The correct spot is where the three colors of the corner piece match the three center colors.
For example, if the corner piece has white, green, and orange, place it below the intersection of the green and orange centers.
Use the algorithm to move the corner into place:
Algorithm: R U R' U' (Repeat until the corner is correctly positioned).
R = Rotate the right layer clockwise.
U = Rotate the top layer clockwise.
R' = Rotate the right layer counterclockwise.
U' = Rotate the top layer counterclockwise.
Repeat for all four white corners:
Ensure each corner is correctly positioned and oriented.
Tip: The entire white face should now be solved, and the first layer should be complete.
Step 3: Solve the Middle Layer
Objective: Place the edge pieces in the middle layer to complete the second layer.
Front Face:
The front face color is determined by the edge piece you’re moving into the middle layer.
Look at the top layer edge piece and align it with the matching center color on the front face.
For example, if the edge piece has green and orange, align it with the green center (front face) or orange center (right face), depending on where it needs to go.
Middle Layer to the Left
Middle Layer to the Right
Look for an edge piece in the top layer:
Find an edge piece that doesn’t have yellow on it.
Align the edge piece with its matching center color:
Rotate the top layer until the edge piece matches the center color of the front face.
Use the appropriate algorithm:
If the edge needs to go to the left:
Algorithm: U' L' U L U F U' F'
If the edge needs to go to the right:
Algorithm: U R U' R' U' F' U F
Repeat until all middle layer edges are correctly placed.
Tip: The first two layers should now be solved.
How to Handle All Edge Pieces with Yellow in the Top Layer
Identify an incorrectly placed middle layer edge:
Look at the middle layer. You’ll notice that one of the edges is either missing or incorrectly placed (it might have the wrong colors).
Move an edge from the top layer to the middle layer:
To fix this, you’ll need to temporarily move one of the yellow edge pieces into the middle layer, which will push out the correct edge into the top layer.
Use the middle layer algorithm:
Choose any edge from the top layer (even if it has yellow) and align it with the center color of the front face.
Apply the appropriate middle layer algorithm:
Left move: U' L' U L U F U' F'
Right move: U R U' R' U' F' U F
Re-solve the middle layer:
After moving the yellow edge into the middle layer, the correct edge will now be in the top layer.
Use the middle layer algorithms again to place the correct edge into its proper position.
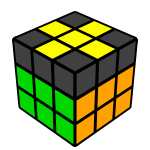
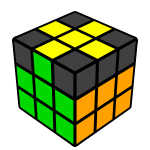
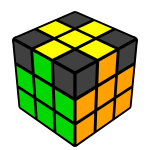
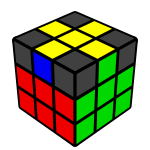
Step 4: Create the Yellow Cross
Objective: Form a yellow cross on the yellow face.
Front Face:
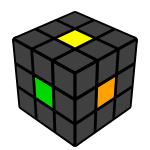
The front face color doesn’t matter at this stage. You can choose any front face color to apply the algorithm.
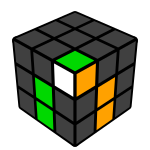
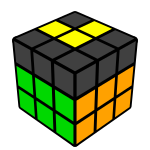
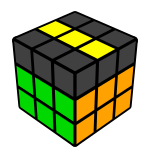
Look at the yellow face:
If there’s no yellow cross, use the following algorithm:
Algorithm: F R U R' U' F'
F = Rotate the front layer clockwise.
R = Rotate the right layer clockwise.
U = Rotate the top layer clockwise.
R' = Rotate the right layer counterclockwise.
U' = Rotate the top layer counterclockwise.
F' = Rotate the front layer counterclockwise.
Repeat the algorithm until a yellow cross appears.
Tip: The yellow cross doesn’t need to align with the side colors yet—just focus on forming the cross.
Step 5: Orient the Yellow Cross
Objective: Align the yellow cross edges with their corresponding side colors.
Front Face:
The front face color is determined by the edge piece that matches its side color.
Rotate the top layer:
Turn the top layer until at least one edge matches its side color.
Position the matching edge:
Hold the cube so that the correctly aligned edge is at the front (facing you) and repeat the algorithm once.
Use the algorithm to cycle the remaining edges:
Algorithm: R U R' U R U2 R'
R = Rotate the right layer clockwise.
U = Rotate the top layer clockwise.
R' = Rotate the right layer counterclockwise.
U = Rotate the top layer clockwise.
R = Rotate the right layer clockwise.
U2 = Rotate the top layer 180 degrees
R' = Rotate the right layer counterclockwise.
If two matching edge:
Turn the two matching edges to its position and hold the cube so that the two correctly aligned edges is at the right and back.
Repeat until all yellow cross edges align with their side colors.
(2) Hold the cube so that the correctly aligned edge is at the front (facing you) and repeat the algorithm once.
(4) Turn the two matching edges to its position
(4) Hold the cube so that the two correctly aligned edges is at the right and back.
Step 6: Position the Yellow Corners
Objective: Place the yellow corner pieces in their correct positions (they don’t need to be oriented yet).
Front Face:
The front face color is determined by the corner piece you’re working on.
If one corner is already correctly positioned, hold the cube so that this corner is in the top-right-front position.
The front face color will be the color of the centerpiece directly below the corner.
E.g: Correctly positioned corner (left yellow) at the top-right-front position
E.g: Correctly positioned corner (right yellow) at the top-right-front position
Look for a correctly positioned corner:
A corner is correctly positioned if it is in the right location relative to the center pieces, even if it’s not twisted correctly (i.e., the colors on the corner piece match the colors of the center pieces on all three sides).
For example, if a corner has yellow, red, and blue, it should be placed at the intersection of the yellow, red, and blue faces.
If one corner is already correct:
Hold the cube so that the correctly positioned corner is in the top-right-front position (the corner closest to you on the right side of the top layer).
This is your starting point for applying the algorithm to position the remaining corners.
If no corners are correct:
If none of the yellow corners are in their correct positions, don’t worry! Simply apply the algorithm once, and it will move one corner into the correct position. Then, you can proceed as described above.
Use the algorithm to cycle the corners:
Algorithm: U R U' L' U R' U' L
U = Rotate the top layer clockwise.
R = Rotate the right layer clockwise.
U' = Rotate the top layer counterclockwise.
L' = Rotate the left layer counterclockwise.
U = Rotate the top layer clockwise.
R' = Rotate the right layer counterclockwise.
U' = Rotate the top layer counterclockwise.
L = Rotate the **left layer clockwise`.
Repeat until all yellow corners are in their correct positions:
After applying the algorithm, check if all the yellow corners are now correctly positioned.
If not, repeat the algorithm until they are.
(2) Hold the cube so that the correct corner is in the top-right-front position.
(5) Repeat until all yellow corners are in their correct positions.
Step 7: Orient the Yellow Corners
Objective: Rotate the yellow corners to complete the cube.
Front Face:
The front face color is determined by the unsolved corner you’re working on.
Hold the cube so that the unsolved corner is in the top-right-front position.
The front face color will be the color of the centerpiece directly below the corner.
(1) unsolved corner in the top-right-front position
(2) Use the algorithm to rotate the corner to its position
(3) Rotate unsolved corner into position and repeat
Hold the cube with an unsolved corner in the top-right-front position.
Use the algorithm to rotate the corner:
Algorithm: R' D' R D (Repeat until the corner is solved).
Rotate the top layer:
Bring the next unsolved corner into position and repeat the algorithm.
Continue until all yellow corners are correctly oriented.
Tip: The cube should now be fully solved!
Practice Makes Perfect
Solving the Rubik’s Cube takes practice and patience. Don’t be discouraged if it takes a few tries to get the hang of it. With time, you’ll become faster and more confident. Once you’ve mastered the beginner’s method, you can explore more advanced techniques like CFOP (Cross, F2L, OLL, PLL) to improve your speed.
Happy cubing! 🎉
onyxcubes
Comments are closed
Explore OnyxCubes from beginner to expert tutorials, tips, and tricks to master the Rubik's Cube. Twist, turn, and triumph in cubing!